 Download
Xposed: A Deep Dive into Android Customization
Xposed is a powerful framework for Android devices, enabling users to extensively personalize their device's functionality and aesthetics without altering core system files. This is achieved through the use of numerous modules that modify app and system settings, unlocking a wide array of customization options and features.

Xposed Installer: Revolutionizing Android Rooting
The Xposed Installer, a free Android module manager, represents a significant leap forward in Android rooting. Unlike traditional methods, Xposed modifies apps without directly altering their APK files. Operating within the device's memory after root access is granted, it supports diverse framework and ROM versions. This approach allows for flexible customization of both system and application behavior through the use of various modules. The installer provides direct access to install multiple modules, streamlining the process of modifying Android's base code without the need for custom ROM flashing.

Key Features of the Xposed Framework:
- Hardware Button Remapping: Customize the functions of your physical buttons.
- Enhanced Power Menu: Add additional options to your device's power menu.
- "OK Google" Expansion: Enable "OK Google" functionality with a broader range of third-party launchers.
- Application Permission Management: Streamline control over app permissions.
- Fine-grained Adjustments: Make subtle tweaks without system instability.
- Simplified Service and Feature Discovery: Easily locate and utilize enhanced services and features.

Xposed Installer: A Step-by-Step Guide
1. Download the Xposed Framework APK: Acquire the Xposed APK from a trustworthy source.
2. Installation: Install the downloaded APK onto your Android device.
3. Launch the App: Open the Xposed Installer from your application drawer.
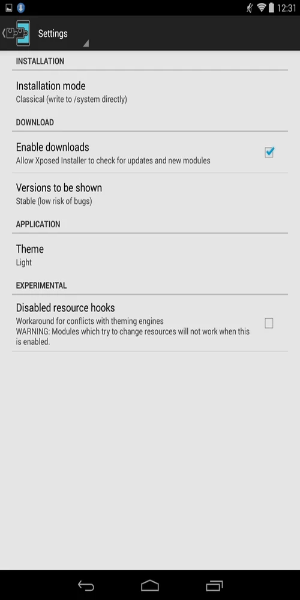
4. Install/Update the Framework: Navigate to "Framework" and select "Install/Update." Grant Superuser permissions (allow sufficient time for this process). The software will run automatically after permission is granted.
5. Reboot Your Device: Restart your device once the rooting process concludes.
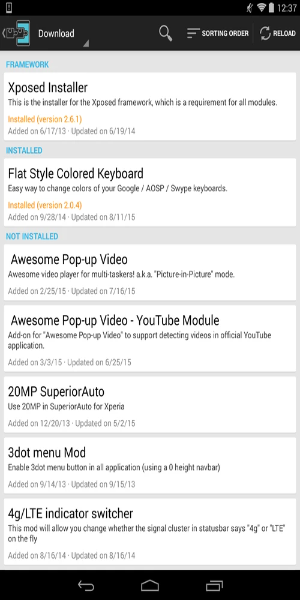
6. Module Installation: Go to the "Download" section, choose your desired module, and click "Download." Install the downloaded module APK.
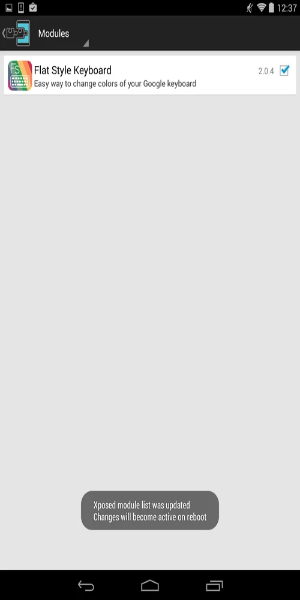
7. Enable Modules: If a module isn't functioning, you may need to enable it manually. Check the "Module" section and use the checkboxes to activate or deactivate modules as needed.