DQ3 Remake Zoma's Citadel Guide
Dragon Quest 3 Remake: Conquering Zoma's Citadel – A Complete Guide
This guide provides a comprehensive walkthrough of Zoma's Citadel in Dragon Quest 3 Remake, the game's climactic dungeon. Prepare for a challenging final test of your party's skills and strategies.
Reaching Zoma's Citadel

After defeating Baramos, you'll enter the darkened world of Alefgard. To reach Zoma's Citadel, you must obtain the Rainbow Drop:
- Sunstone: Found in Tantegel Castle.
- Staff of Rain: Located in the Shrine of the Spirit.
- Sacred Amulet: Received from Rubiss after rescuing her in the Tower of Rubiss (requires the Faerie Flute).
Combine these items to create the Rainbow Drop and build the bridge to the Citadel.
Zoma's Citadel Walkthrough
1F:
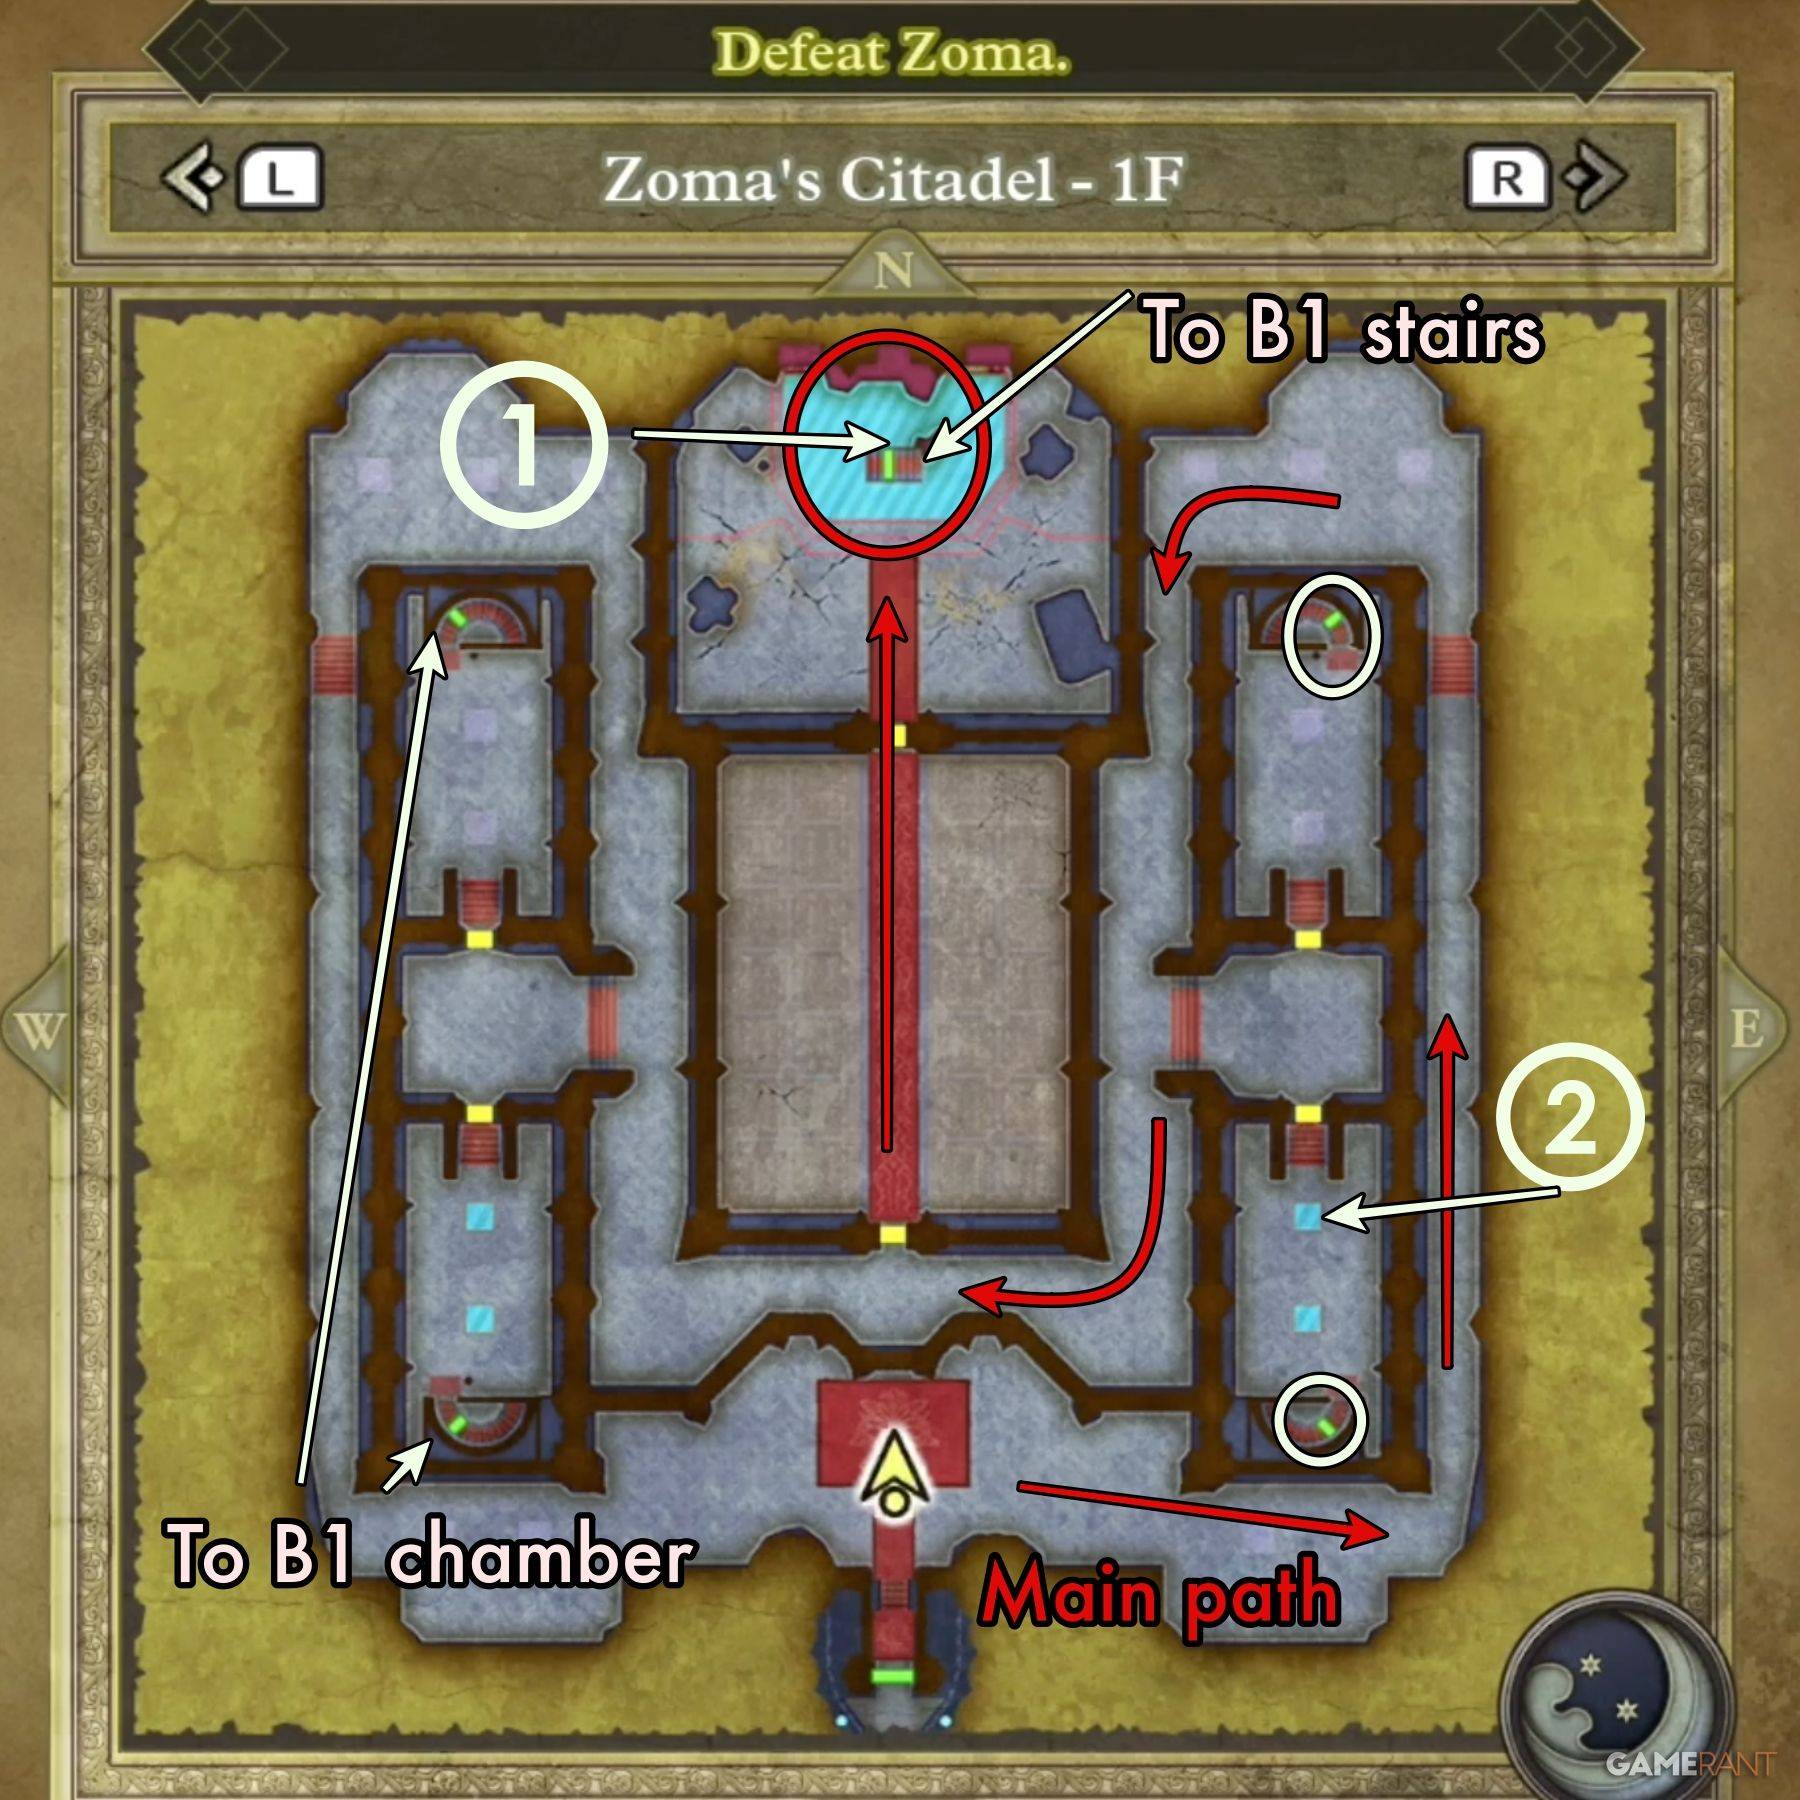
Navigate the first floor, avoiding Living Statues, to reach the throne. Activating the throne reveals a hidden passage. Explore side chambers for treasure:
- Treasure 1 (Buried): Mini Medal (behind throne).
- Treasure 2 (Buried): Seed of Magic (near electrified panel).
B1:
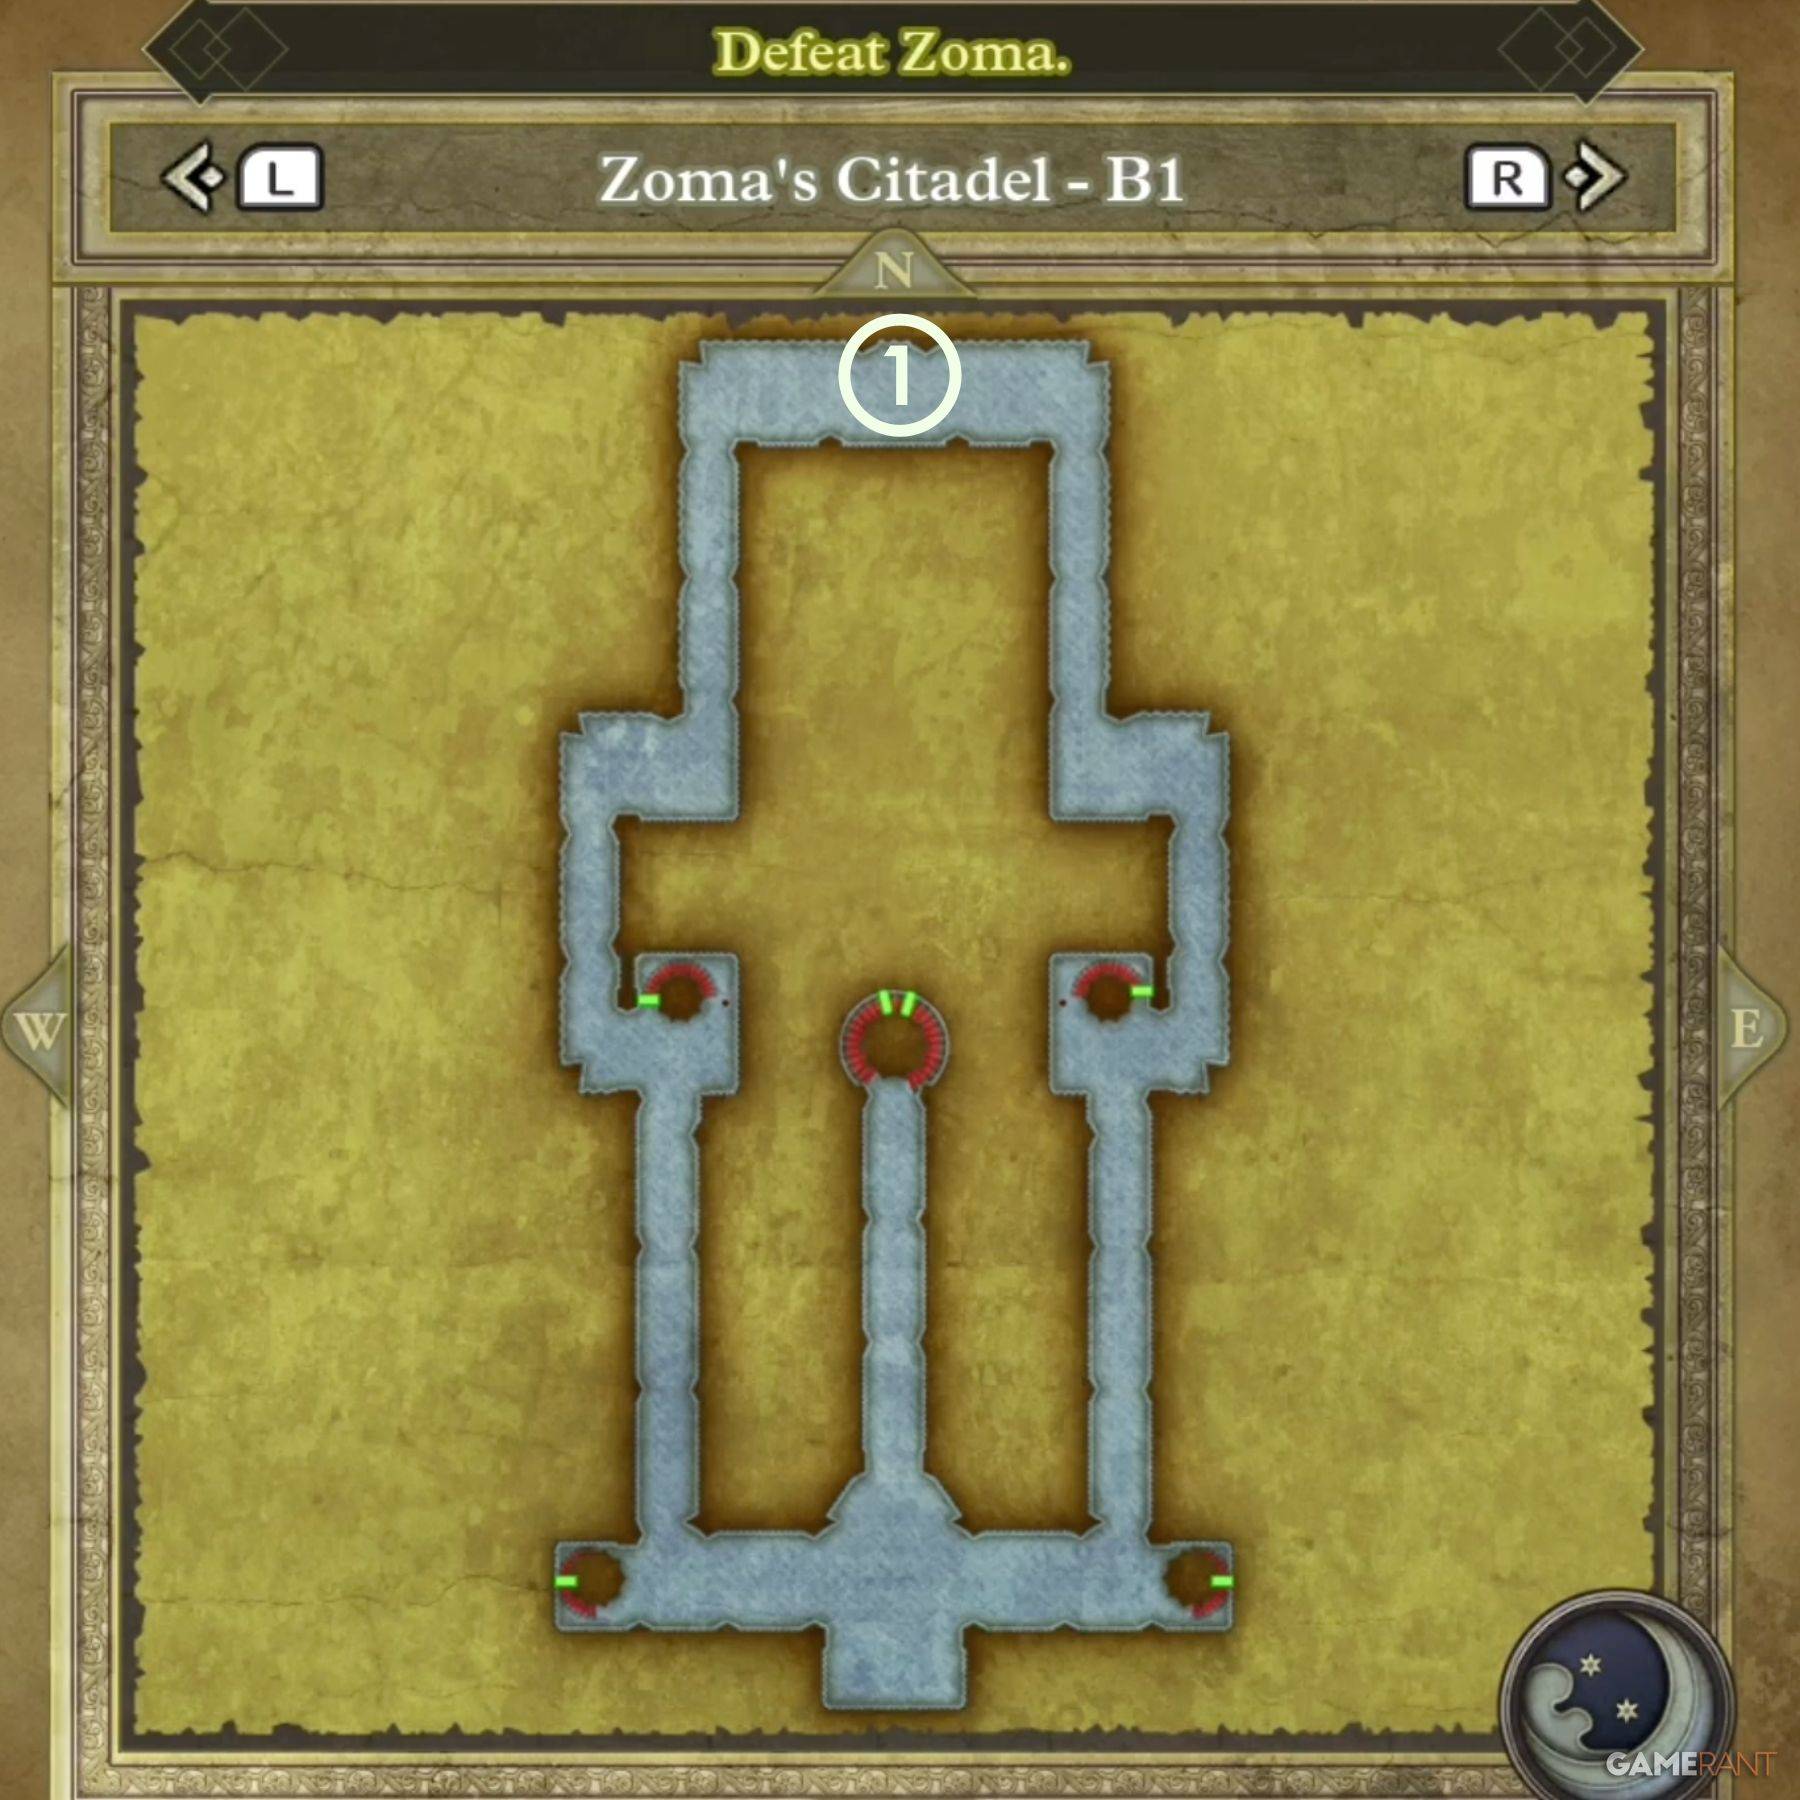
B1 contains a single chest:
- Treasure 1 (Chest): Hapless Helm
B2:

This floor features directional tiles. Mastering them requires understanding the color-coded directional inputs (refer to the original guide for detailed tile mechanics). The path leads to B3. Collect these treasures:
- Treasure 1 (Chest): Scourge Whip
- Treasure 2 (Chest): 4,989 Gold Coins
B3:
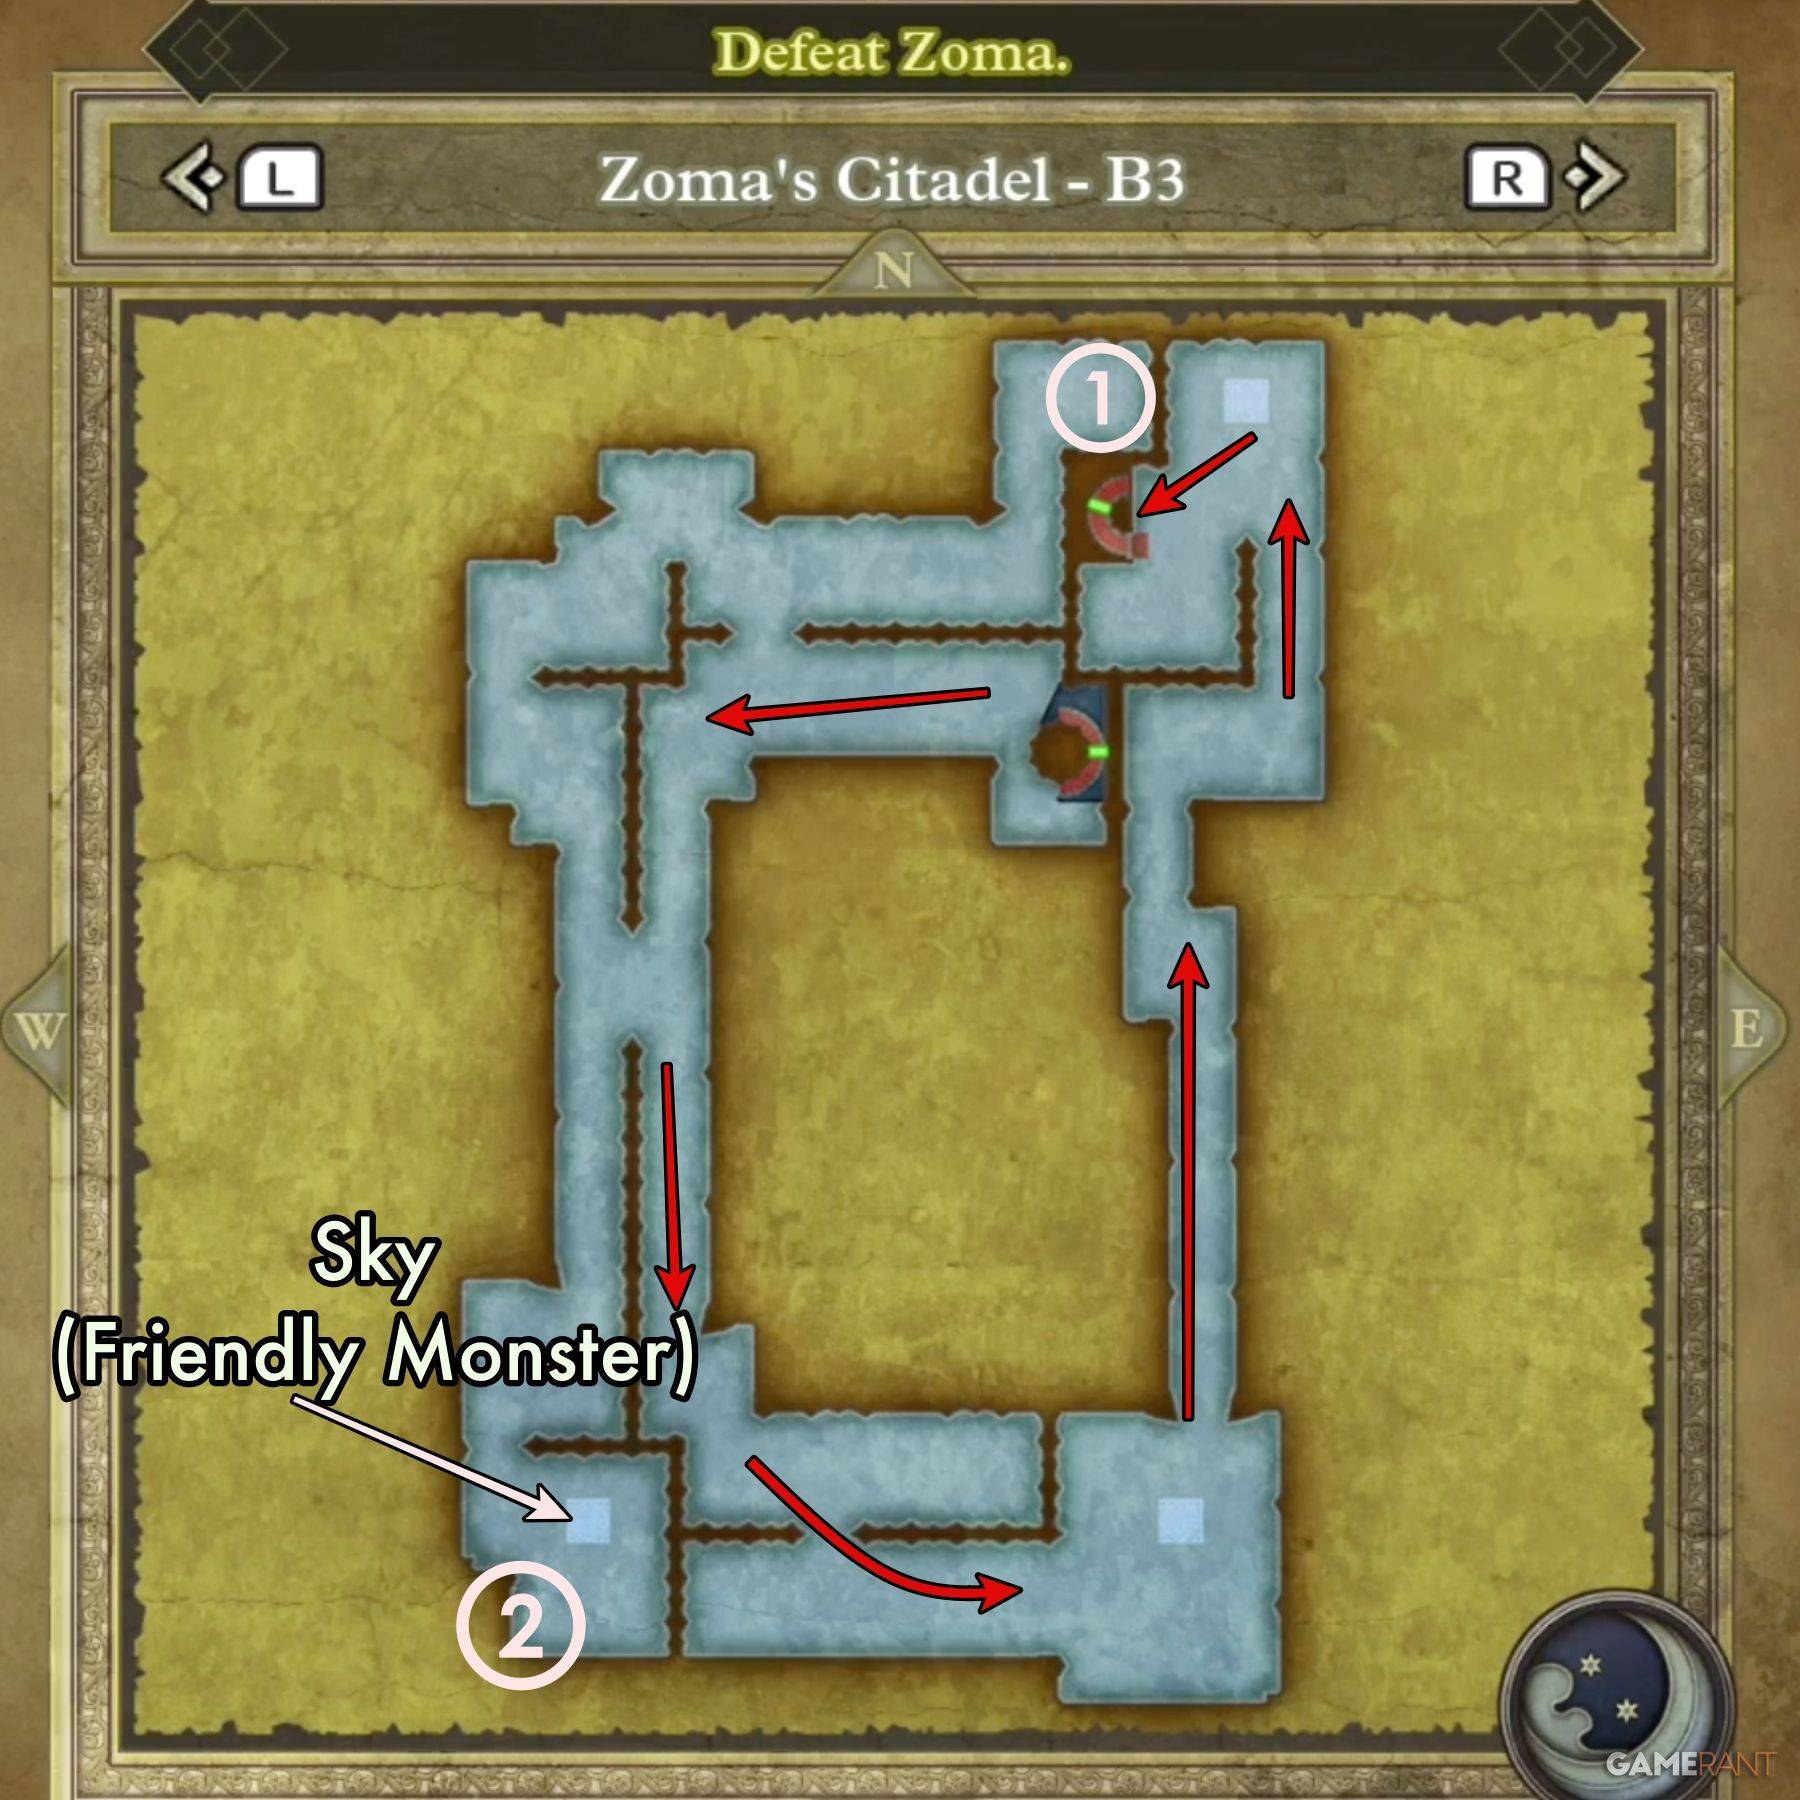
Follow the outer path, encountering Sky, a friendly monster. An isolated chamber (accessible via falling through B2 tiles) contains another friendly monster and treasure:
- Treasure 1 (Chest): Dragon Dojo Duds
- Treasure 2 (Chest): Double-Edged Sword
- Treasure 3 (Chest): Bastard Sword (Isolated Chamber)
B4:

The final floor before Zoma. Watch the cutscene upon entry. Collect the six chests in the main chamber:
- Treasure 1 (Chest): Shimmering Dress
- Treasure 2 (Chest): Prayer Ring
- Treasure 3 (Chest): Sage's Stone
- Treasure 4 (Chest): Yggdrasil Leaf
- Treasure 5 (Chest): Diamond
- Treasure 6 (Chest): Mini Medal
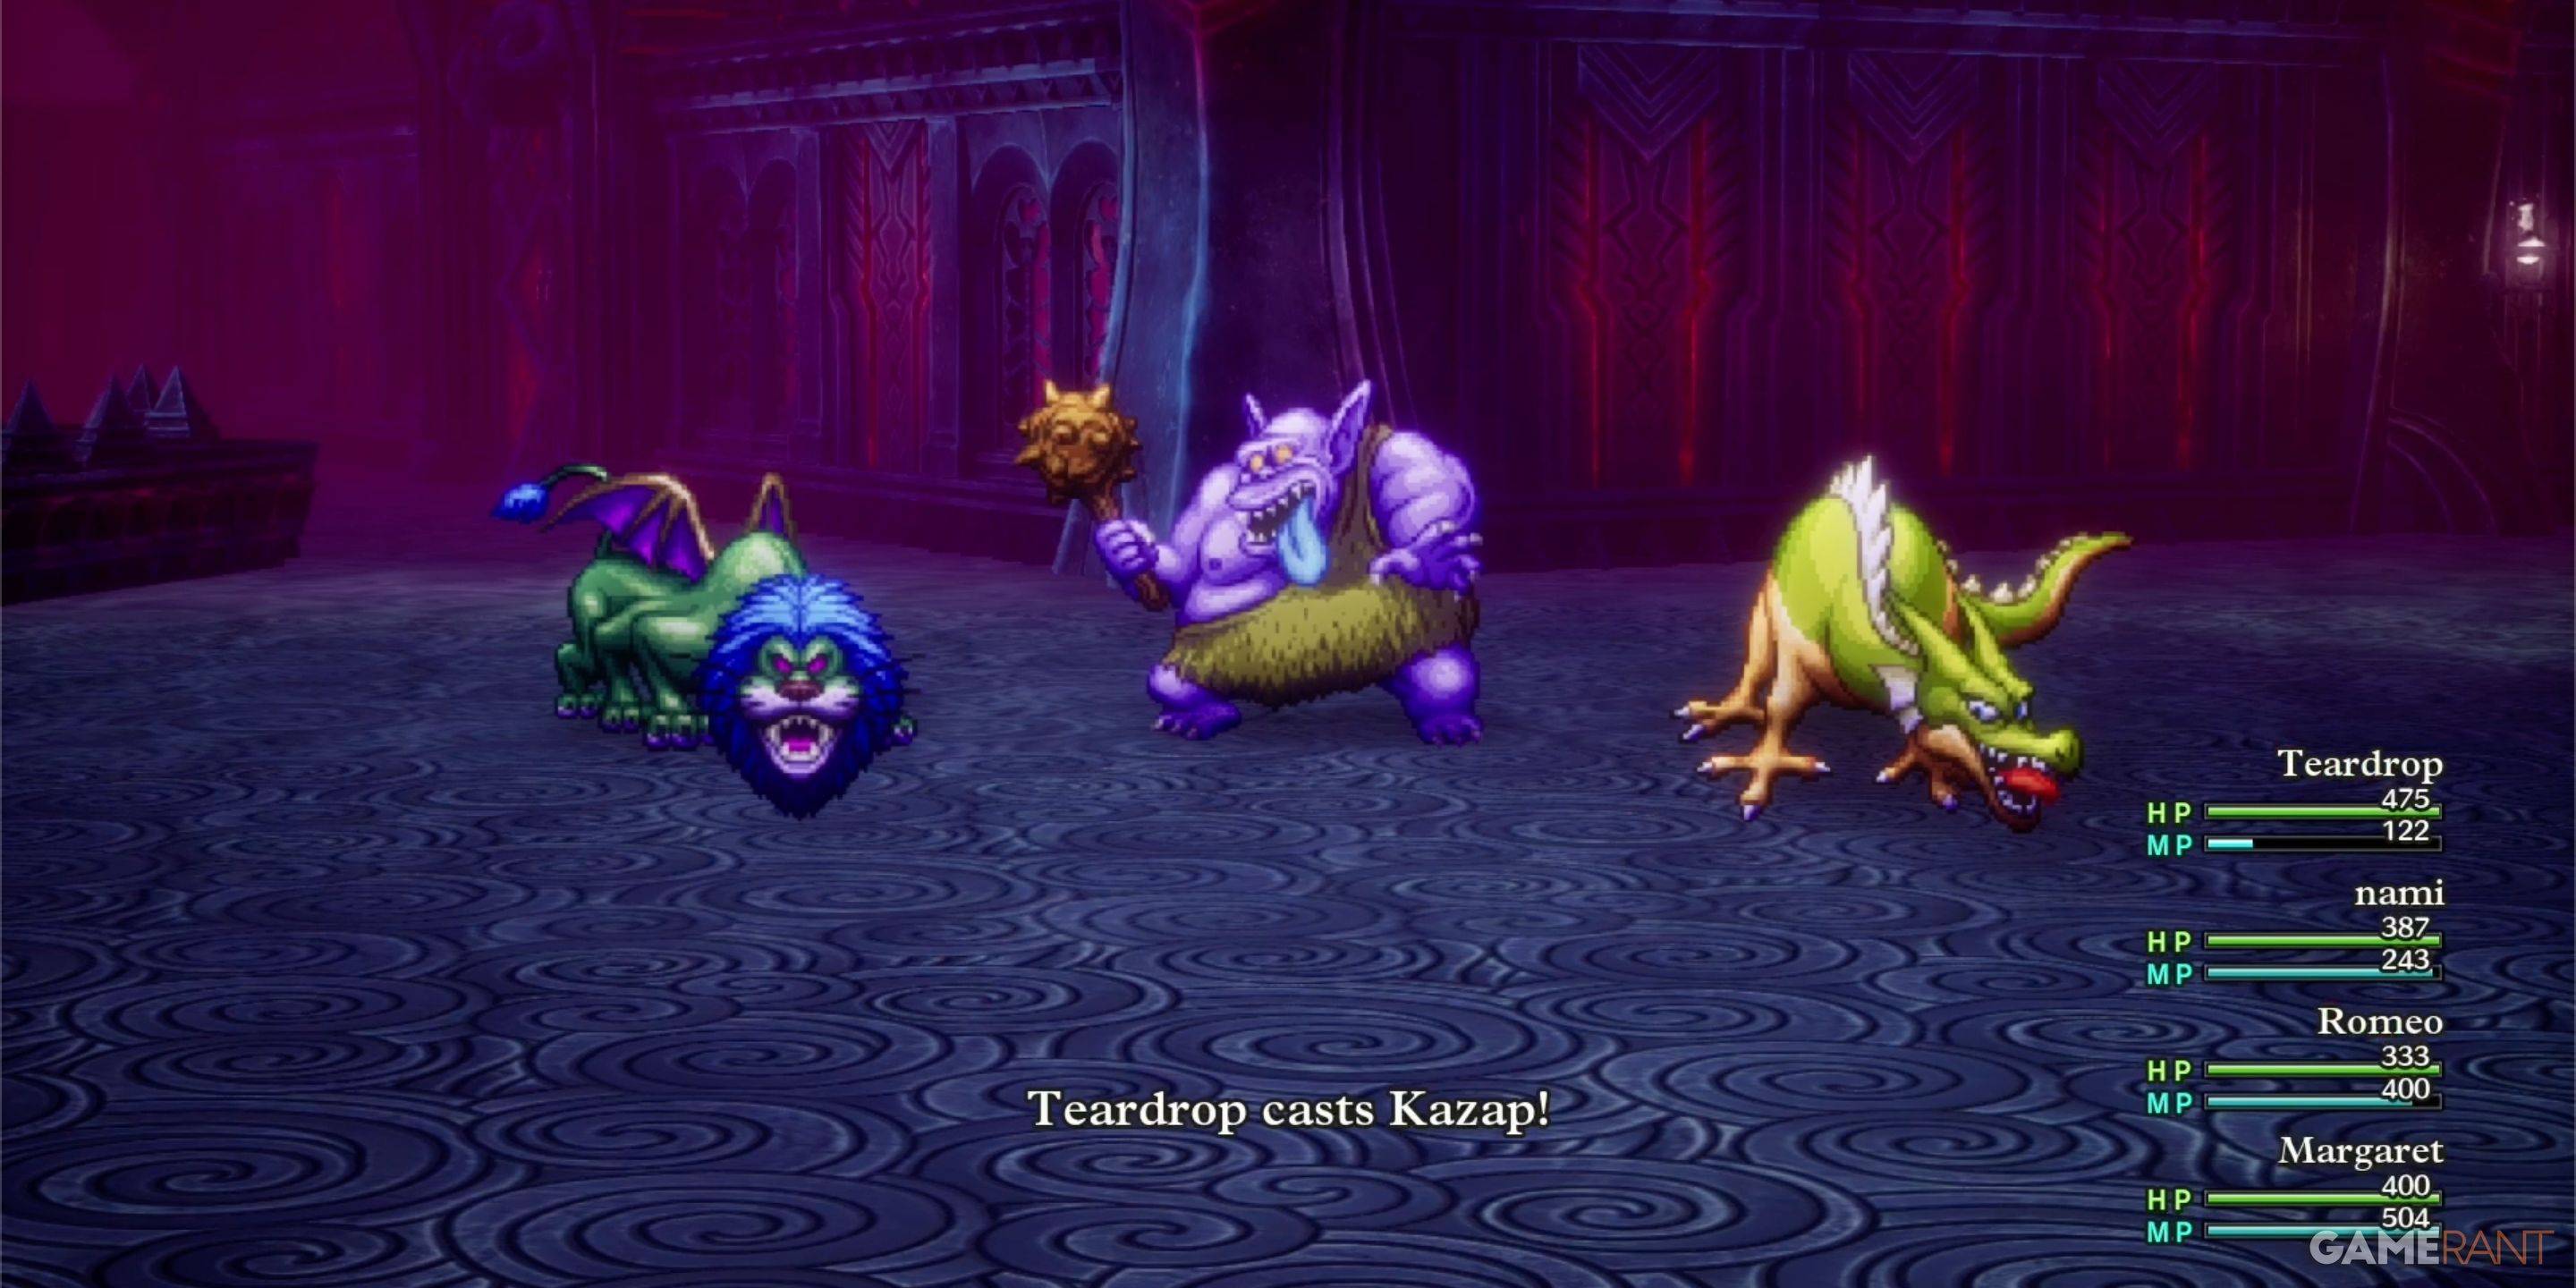
Defeating Zoma and His Minions

Before facing Zoma, you'll battle the King Hydra, Soul of Baramos, and Bones of Baramos. Use items between each fight. Strategies for these bosses are detailed in the original guide.
Zoma:

Zoma starts with a magic barrier. Wait for the prompt to use the Sphere of Light, removing the barrier and making him vulnerable to Zap attacks. Prioritize HP management and strategic attacks.
Monster List:
(Monster list table from original guide is included here)
This guide condenses information from the original, offering a streamlined walkthrough of Zoma's Citadel. Remember to consult the original for detailed strategies and enemy weakness information.
-
 Aniimo is a newly revealed creature-collecting ARPG developed by Pawprint Studios.Collect creatures called Aniimo and magically merge with them.Harness each creature's unique abilities to explore and traverse the magical realm of Idyll.With the weekeAuthor : Mila May 26,2026
 -
 Leave Lex Luthor's Kryptonian chaos for Superman's family to handleUnlock Krypto through the new Super Fetch Time limited eventRecruit Supergirl to your squad, with Superboy joining soonWhile the Bat-family receives enhancements, FunPlus is capitalizAuthor : Sebastian May 26,2026
-
 ASMR Makeover: Beauty MakeupDownload
 -
 Passpartout 2Download
 -
 Basket Fall - Infinity ShootDownload
 -
 World Champions Cricket GamesDownload
 -
 Soccer LegendDownload
 -
 Top ElevenDownload
 -
 Highway Truck Simulator 2023Download
 -
 Grand Army Shooting GamesDownload
 -
 Fps Shooting Strike: Gun GamesDownload
 -
 7 RiddlesDownload


- STALKER 2: Heart of Chornobyl - All Endings (& How to Get Them)
- Metaphor: ReFantazio - Complete Bond Guide
- NYT Hints and Answers: Guide to January 10, 2025
- Steampunk RPG Eldgear Unveiled by KEMCO
- Discover the Artifacts in Stalker 2: Locations and Acquisition
- Mushroom Go! Unleashes Co-op Dungeon Adventure for Fungi Fans